Cardboard Box Castle
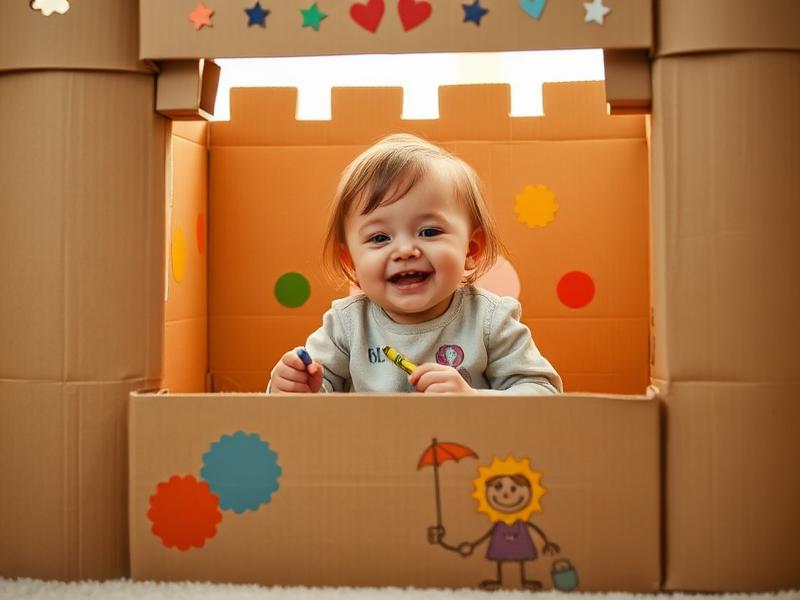
I'll never forget the day our new refrigerator arrived. My three-year-old son took one look at the giant cardboard box in our garage and his eyes went wide. 'Can I have it?' he asked. What followed was three weeks of the most imaginative play I've ever witnessed. That box was a castle, then a spaceship, then a submarine, then a restaurant. It had windows cut in different places, marker drawings covering every surface, and eventually fell apart from so much love. The memory of his little face peeking out of that cardboard castle is still one of my favorites.
Age Safety Note
This activity is ideal for 3-4 year olds who can follow basic safety instructions. The most important rule: all cutting is done by adults only. Before handing the box to your child, run your hands along every edge checking for staples, sharp cardboard corners, or leftover tape that could cut skin. Fold rough edges inward or cover them with masking tape. If using markers, choose washable ones—permanent markers have a strong smell that isn't good for little ones to breathe in an enclosed space.
Why This Activity Works
There's a reason every parent has watched their child ignore expensive toys in favor of a cardboard box. Boxes offer something toys can't: endless possibility. A box can be anything a child imagines, and that open-ended nature is exactly what developing brains need. When your 3-year-old transforms a box into a fire station, they're practicing abstract thinking, narrative skills, and creative problem-solving. The decorating process builds fine motor control and artistic confidence, while the imaginative play that follows develops language, social skills, and emotional regulation.
Materials Needed
- Large cardboard box
Appliance boxes are the gold standard, but any box big enough for your child to sit in works great.
- Crayons or washable markers
Stock up! Big decorating projects use more than you'd expect.
- Stickers
Large stickers only for this age—1 inch or bigger. Small stickers are choking hazards.
- Masking tape
Useful for covering sharp edges and attaching decorations.
- Scissors or box cutter
Adult use only! Keep these completely out of reach when not in use.
Prep Tips (Before You Start)
- 1Check the entire box for staples, tape residue, and sharp edges before your child comes near it.
- 2Decide together where windows and doors should go, then have your child play elsewhere while you cut.
- 3Lay down an old sheet or tarp if working indoors—marker can bleed through cardboard onto floors.
- 4Gather all supplies before you start so you don't have to leave your child unattended with scissors in the room.
- 5Consider doing the cutting outside if weather permits—box cutters throw cardboard dust.
Step-by-Step Guide
- 1Present the box to your child and ask the magic question: 'What do you want this to be?' Their answer might surprise you.
- 2Once they've decided (castle, rocket, house, dinosaur cave—anything goes), discuss where doors and windows should go. Draw the shapes with marker first.
- 3Have your child play in another room while you cut. This is not optional—box cutters and curious preschoolers don't mix.
- 4Call your child back and watch their face light up when they see the transformation. This moment is worth the whole project.
- 5Now the real fun begins: decorating! Offer crayons, markers, and stickers. If it's a castle, they might draw bricks. A spaceship gets buttons and stars.
- 6Add details together: a drawbridge that folds down, a steering wheel drawn on the inside, flowers around the door, a flag on top made from paper and a straw.
- 7Once decorated, step back and admire the creation. Ask your child to give you a tour and tell you about everything inside.
- 8Let the imaginative play begin! Your job is now complete—sit back and watch the magic happen.
Fun Variations to Try
- •Make a smaller box into a house for stuffed animals or dolls.
- •Connect multiple boxes to create a tunnel system or a train with multiple cars.
- •Create a 'drive-through' window and play restaurant, with your child taking orders.
- •Add fabric scraps as curtains for the windows to make it feel more 'real.'
Cleanup Tips
- Flatten the box for storage between play sessions—just pop it back open when needed.
- When the box finally falls apart, take photos first! These memories deserve to be preserved.
- Broken cardboard goes straight to recycling, but save any nice stickers or decorations that can be reused.
- If marker got on the floor, washable varieties come up with a wet rag and a little dish soap.
Real Parent Story
"When our new fridge arrived, the box was so big that both twins could fit inside with room to spare. We weren't sure if they'd fight over it, but instead they immediately started collaborating: 'This is our dragon house!' Ava declared. 'I'm the dragon, and Theo is the knight who brings me treasure.' For two solid weeks, that box was the center of their universe. They decorated every inch of it. The inside had crayon 'fire' (red and orange scribbles), and the outside had what they called 'treasure maps.' They served me imaginary soup through the window. They slept next to it for naps. When it finally collapsed from overuse, there were genuine tears. We kept a piece of it—a section Ava had covered in hearts—and it's still pinned to their bulletin board. Best free toy we ever 'bought,' and a reminder that the simplest things often bring the greatest joy."
— Marcus, dad of 3-year-old twins Ava and Theo
Bonus Tips From Parents
- Take video of your child's first reaction when they see the box. You'll treasure it.
- Let the box evolve naturally. If it's a castle today and a taco truck tomorrow, that's perfect.
- Resist the urge to make it 'nicer.' Your child's decorations, however messy, are the whole point.
- Join the play! Crawl inside if you can fit, or stand outside the 'door' and knock, asking if anyone's home.
References & Further Reading
General guidance we rely on when writing activities. These are broad resources rather than sources for this specific craft.
Toddler Ages & Stages
American Academy of Pediatrics
What to expect physically, socially and cognitively from 1 to 3 years.
The Power of Play
American Academy of Pediatrics
Why unstructured, hands-on play matters more than structured lessons at this age.
Choking Prevention
American Academy of Pediatrics
How to judge whether an object is a choking risk, and what to do if it happens.
Art Material Safety & the AP Seal
Art & Creative Materials Institute
Look up which craft supplies are certified non-toxic for children.
Toddler Play & Learning
Raising Children Network
Evidence-based play ideas grouped by developmental skill.
Poison Control
America's Poison Centers
Free 24/7 guidance if your child swallows something they shouldn't.
Ready for more fun?