Edible Playdough Exploration
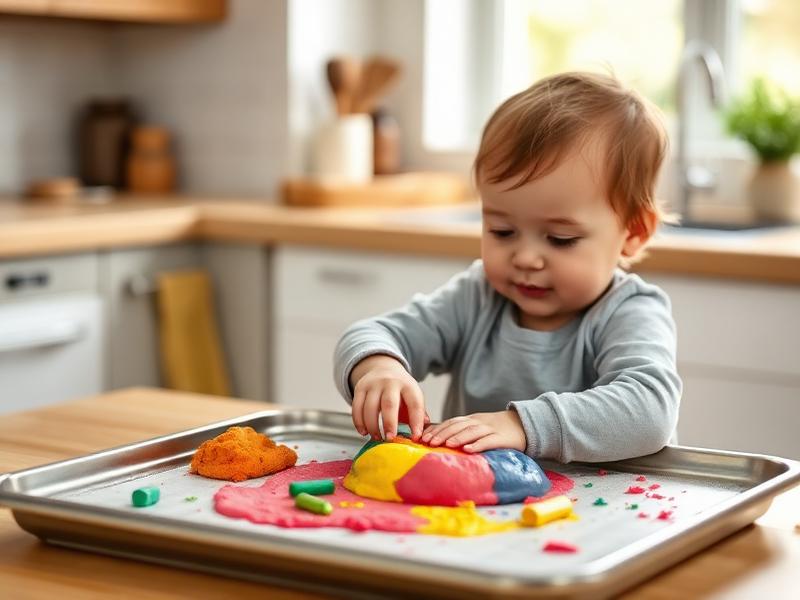
When my daughter was 14 months old, I wanted to introduce playdough but was terrified she'd eat it. Store-bought dough is non-toxic but not exactly meant to be dinner. So I found a recipe using just flour, water, and a bit of oil—ingredients so safe I'd eat them myself (okay, I tasted it to check, and it's bland but harmless). Watching her squish and poke at the dough with intense concentration, occasionally bringing it to her mouth for a taste, then continuing to play—it was the perfect safe introduction to the wonderful world of dough.
Age Safety Note
This recipe is designed specifically for the age when babies still taste everything. All ingredients are food-grade and safe to ingest in small amounts. However, it's not meant to be eaten in quantity—it's essentially raw flour and salt, which isn't harmful but isn't nutritious either. If your child is eating significant amounts, offer a snack instead and return to the dough when hunger has passed. Avoid adding essential oils or scented extracts if your child is a persistent taster.
Why This Activity Works
Dough play is one of the richest sensory activities available to young children. It's cold, then warms from their hands. It can be squished, poked, pulled, rolled, and shaped. For 1-2 year olds who are developing fine motor control, the resistance of dough provides exactly the right amount of challenge. The proprioceptive input—the deep pressure feedback from squeezing—is calming and organizing for the nervous system. And because this dough is safe to taste, parents can relax and let exploration happen naturally.
Materials Needed
- All-purpose flour
About 2 cups per batch. Whole wheat works but has a grittier texture.
- Water
Add gradually—about 3/4 cup, adjusting until you get the right consistency.
- Vegetable oil
A tablespoon makes the dough smoother and less sticky.
- Food coloring (optional)
Add to the water before mixing if you want colored dough. Skip if your child is a big taster.
- Large tray or mat
Contains the mess and defines the play space.
Prep Tips (Before You Start)
- 1Mix the dough in the kitchen before presenting it—watching dough being made isn't as interesting as playing with it.
- 2Start with flour in a bowl, add oil, then slowly add water while mixing until it comes together.
- 3Knead for a minute or two until smooth. If sticky, add flour; if crumbly, add water drops.
- 4Let your child play on a high chair tray, sealed mat, or clean floor—wherever works best.
- 5Have a damp cloth ready for sticky fingers and another for the inevitable face wipes.
Step-by-Step Guide
- 1Place a ball of dough in front of your child without instruction. Let curiosity lead.
- 2Model actions if they seem unsure: poke it with one finger, squeeze it in your fist, flatten it with your palm.
- 3Narrate what happens: 'You're squishing it! Look how flat it got!'
- 4Introduce simple tools as interest develops: a spoon for poking, a plastic cup for 'cookie cutting.'
- 5If they taste it, stay calm. 'That's not yummy, is it? Let's keep playing with our hands.'
- 6Roll small balls together and let your child smash them flat. Very satisfying!
- 7When attention fades, seal the dough in plastic and refrigerate. It keeps for about a week.
Fun Variations to Try
- •Add a drop of vanilla or cinnamon for scent (taste-safe flavors only).
- •Press cookie cutters into flattened dough—they don't need to cut through, just make impressions.
- •Hide small (large enough to be safe) toys under the dough for your child to discover.
- •Make different colored balls and let your child squish them together—watching colors mix is fascinating.
Cleanup Tips
- Let dough dry out before sweeping—dry dough vacuums up much easier than fresh.
- Flour on hands wipes off easily with a damp cloth.
- Store leftover dough in an airtight container or wrapped tightly in plastic wrap.
- If dough hardens between uses, knead in a few drops of water to refresh it.
Real Parent Story
"Maya puts absolutely everything in her mouth. Everything. So when my wife suggested playdough, I was skeptical—wasn't she going to just eat it? But we made the edible version together one Saturday morning, and something magical happened. Maya touched it cautiously at first, then poked it, then picked up a piece and yes, straight to the mouth. She made a face—it's not delicious—and then put it back on the tray. After that initial taste-test, she was done trying to eat it. She spent the next twenty minutes just... playing. Poking, squishing, tearing pieces off and sticking them back. My wife and I sat there in stunned silence. We'd finally found an activity she'd actually do instead of eat. Now edible dough is our go-to when we need a few minutes of engaged play. It's become a weekend morning tradition: make a fresh batch, sit together at the table, and just squish. Maya's learned to roll balls now, and she's so proud when she makes one. The best part? When she occasionally still takes a taste, I don't have to panic. That peace of mind is priceless."
— Sam, dad of 13-month-old Maya
Bonus Tips From Parents
- Don't worry about teaching 'techniques.' Exploration is the point.
- Some days your child will play for twenty minutes; other days, two. Both are normal.
- If they get frustrated or bored, add something new: a spoon, a different color, a small toy to press in.
- Take photos of handprints pressed into dough—a sweet way to capture tiny hands.
References & Further Reading
General guidance we rely on when writing activities. These are broad resources rather than sources for this specific craft.
Toddler Ages & Stages
American Academy of Pediatrics
What to expect physically, socially and cognitively from 1 to 3 years.
The Power of Play
American Academy of Pediatrics
Why unstructured, hands-on play matters more than structured lessons at this age.
Choking Prevention
American Academy of Pediatrics
How to judge whether an object is a choking risk, and what to do if it happens.
Art Material Safety & the AP Seal
Art & Creative Materials Institute
Look up which craft supplies are certified non-toxic for children.
Toddler Play & Learning
Raising Children Network
Evidence-based play ideas grouped by developmental skill.
Poison Control
America's Poison Centers
Free 24/7 guidance if your child swallows something they shouldn't.
Ready for more fun?