Ice Cube Sensory Play
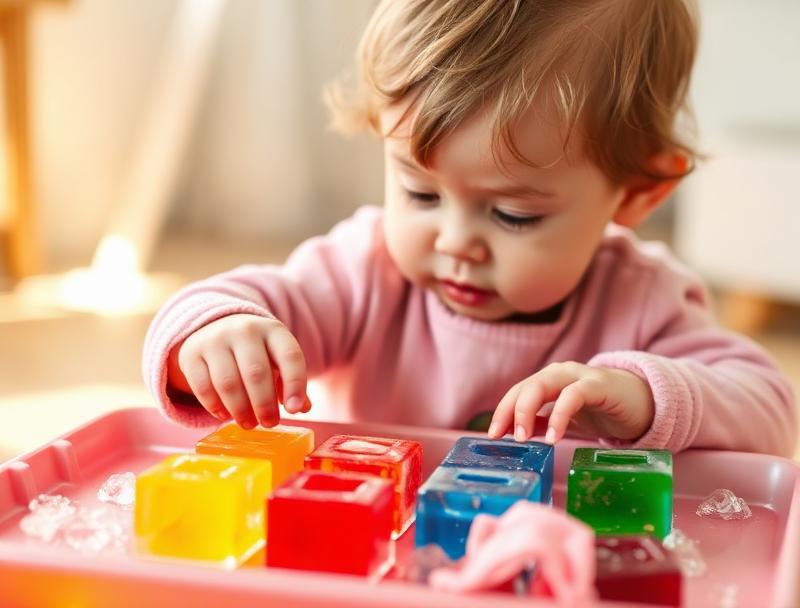
On a hot summer afternoon, I filled an ice cube tray with water and food coloring, popped it in the freezer overnight, and the next day presented my toddler with a tray of rainbow ice cubes. Her reaction was priceless: she poked one tentatively, pulled her finger back in surprise at the cold, then dove in with both hands. What followed was thirty minutes of the most focused, joyful sensory exploration I've ever witnessed. Ice cubes teach concepts that are hard to explain but easy to experience: cold, wet, melting, change. And the best part? The mess cleans up with just a towel.
Age Safety Note
Ice cubes are generally safe for babies 12-24 months, but a few precautions matter. First, cold hands happen quickly—watch for signs of discomfort and offer warm water breaks. Second, small ice cubes can be choking hazards, so make large cubes (muffin tin size works great). Third, never leave baby unattended near melted ice water, even small amounts. Finally, colored ice can temporarily stain hands and surfaces—use food coloring sparingly and don't worry if baby's palms turn blue for a few hours. It washes off.
Why This Activity Works
Ice cube play introduces scientific concepts in a hands-on way: solids melting into liquids, colors mixing, temperature changing. For toddlers, the sensory experience is intense and novel—cold is such a different sensation from the warm, room-temperature world they usually explore. The cause-and-effect of holding ice and feeling it shrink, seeing it create puddles, is fascinating at this age. And unlike many sensory activities, ice cube play is naturally time-limited (the ice melts!), which provides a built-in ending that toddlers accept more easily than 'okay, time to stop now.'
Materials Needed
- Ice cube trays
Use larger molds like muffin tins for younger babies—easier to handle and no choking risk.
- Food coloring
Just a drop or two per cube makes bright colors without overly staining skin.
- Shallow tray or bin
Rimmed baking sheets work perfectly for containing the melt water.
- Towels
Lay one underneath the tray and have extras ready for drying cold hands.
- Warm water in a bowl
For warming up little hands that get too cold.
Prep Tips (Before You Start)
- 1Make ice cubes the night before—they need to freeze solid, which takes 6+ hours.
- 2Add just 1-2 drops of food coloring per cube; more makes staining worse without better color.
- 3Consider freezing small toys or flowers inside for surprise discoveries as ice melts.
- 4Set up on a floor mat or towel—water will definitely drip off the tray.
- 5Do this activity before bath time for easy cleanup of any colored water on skin.
Step-by-Step Guide
- 1Pop the colorful ice cubes out of their trays and arrange on the shallow tray.
- 2Let your baby discover them! 'Touch it! What does it feel like?' Watch their reaction to the cold.
- 3Talk about what's happening: 'It's cold! It's slippery! Look, it's getting smaller—it's MELTING!'
- 4Offer warm water when hands get too cold. This temperature contrast is its own learning experience.
- 5As cubes melt, point out color mixing: 'The red and yellow are mixing together—what color is that? ORANGE!'
- 6Let baby push cubes around the tray, stack them (they'll slide!), or just hold one and feel it shrink.
- 7When most ice is melted, the activity naturally ends. Clean up the colored water together.
Fun Variations to Try
- •Freeze small bath toys inside the cubes for a rescue mission as they melt.
- •Add ice cubes to a water table or large bin for extended play.
- •Make ice paint: freeze paint mixed with water in ice pop molds, then use the pops as painting tools.
- •Try salt on ice cubes to speed up melting and create crackle effects—older toddlers love this!
Cleanup Tips
- Colored melt water can be poured down the sink—it won't stain drains.
- If hands are stained, a little baking soda with water helps remove food coloring faster.
- Silicone ice cube molds are easier to pop frozen cubes from than rigid plastic trays.
- Make extra cubes and keep some in the freezer for a quick activity setup next time.
Real Parent Story
"With twins, I'm always looking for activities that occupy both kids without requiring me to facilitate constant turn-taking. Ice cube sensory play is my secret weapon. I make a huge batch of rainbow cubes in muffin tins and dump them into a big shallow bin on our back patio. Each twin claims their corner and goes to work. Eva is methodical—she lines up cubes by color and watches each one melt. Sam is chaotic—he smashes them together and delights in the mess. They both stay engaged for a shockingly long time. The cold keeps them from overheating on summer days, and when the ice is melted, I just dump the colored water in the garden. Total setup time: 2 minutes. Cleanup time: 5 minutes. Engaged, happy toddler time: 30+ minutes. Those are parent-win numbers. We do ice cube play almost every hot day now. My freezer always has rainbow cubes ready to go."
— Marcus, dad of 18-month-old twins Eva and Sam
Bonus Tips From Parents
- Large cubes last longer and are safer for mouthing babies—use muffin tins instead of standard trays.
- Freeze in layers to create multi-colored cubes: freeze blue, add yellow on top, freeze again.
- If you're worried about staining, skip food coloring—clear ice is still fascinating to toddlers.
- Ice cube play works indoors too; just protect your floor with a waterproof mat or do it in a bathtub.
References & Further Reading
General guidance we rely on when writing activities. These are broad resources rather than sources for this specific craft.
Toddler Ages & Stages
American Academy of Pediatrics
What to expect physically, socially and cognitively from 1 to 3 years.
The Power of Play
American Academy of Pediatrics
Why unstructured, hands-on play matters more than structured lessons at this age.
Choking Prevention
American Academy of Pediatrics
How to judge whether an object is a choking risk, and what to do if it happens.
Art Material Safety & the AP Seal
Art & Creative Materials Institute
Look up which craft supplies are certified non-toxic for children.
Toddler Play & Learning
Raising Children Network
Evidence-based play ideas grouped by developmental skill.
Poison Control
America's Poison Centers
Free 24/7 guidance if your child swallows something they shouldn't.
Ready for more fun?