Nature Suncatcher
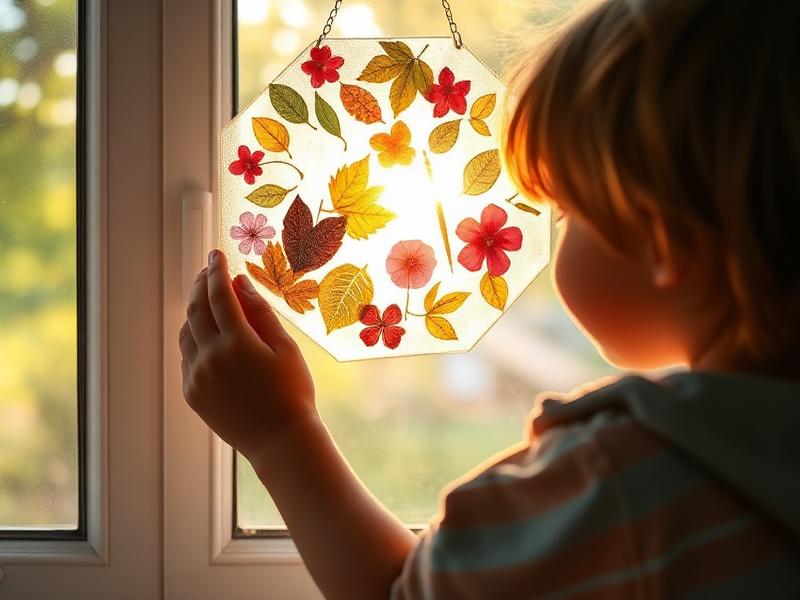
We made our first nature suncatcher on a golden October afternoon, using leaves from the maple tree in our front yard. When we hung it in the window and the afternoon sun hit it, my daughter gasped. 'Mommy, the leaves are GLOWING!' And they were—the translucent contact paper made the autumn colors shine like stained glass. That suncatcher hung in our window for three months, and every sunny afternoon we'd stop to admire it. Nature suncatchers turn ordinary walks into treasure hunts and give found natural items a second life as art.
Age Safety Note
This activity is perfect for 3-4 year olds, but requires adult handling of contact paper and scissors. The contact paper edges can be sharp after cutting, so trim with adult scissors and fold edges under if possible. All natural materials should come from areas you know are pesticide-free. Teach children to collect but not taste—some plants are toxic. Wash hands thoroughly after handling outdoor materials. Small, thick items like acorns may not press flat and can fall off; stick to thin, flat items for best results.
Why This Activity Works
Nature suncatchers combine several developmental benefits: outdoor time during collection walks, sorting and decision-making when choosing items, fine motor practice during arrangement, and scientific observation when watching how light passes through different materials. For preschoolers developing aesthetic awareness, the 'gallery' feel of a window display validates their creative choices. The lasting nature of the final product—unlike picked flowers that wilt—provides ongoing satisfaction.
Materials Needed
- Clear contact paper
Two pieces per suncatcher—one sticky side for pressing items, one to seal on top.
- Pressed flowers and leaves
Press between book pages 2-3 days ahead. Fresh items work but don't last as long.
- Paper plate frame (optional)
Cut out the center to create a frame. Adds structure and is easier for hanging.
- Yarn or ribbon
For hanging. About 12 inches per suncatcher.
- Scissors
Adult-only for cutting contact paper and paper plates.
Prep Tips (Before You Start)
- 1Press natural materials 2-3 days before the craft. Place between book pages with heavy weights on top.
- 2Cut contact paper to size before you begin. It's easier to manage pre-cut.
- 3Peel contact paper slowly—it wrinkles easily if rushed.
- 4If using paper plate frames, cut out the center first, leaving a 1-2 inch frame.
- 5Set up near a flat surface with good light so your child can see the materials clearly.
Step-by-Step Guide
- 1Go on a nature walk together. Collect flat items: leaves, petals, thin flowers, small ferns. Talk about colors and shapes.
- 2Back home, press your treasures between book pages. Wait 2-3 days (or do a quick-press with a warm iron between paper towels—adult only).
- 3Cut a piece of contact paper slightly larger than your planned suncatcher. Peel off the backing and lay sticky-side up on the table.
- 4Let your child arrange pressed items on the sticky surface. 'Where do you want this leaf? Here? Perfect!'
- 5When the design is complete, carefully lay a second piece of contact paper on top, sticky side down. Smooth out bubbles.
- 6Trim edges with scissors. If using a paper plate frame, attach the contact paper 'window' to the back of the frame with tape.
- 7Punch a hole at the top and thread yarn through for hanging.
- 8Hang in a sunny window and watch the light transform your natural art!
Fun Variations to Try
- •Use crayon shavings between the contact paper layers—they melt slightly in sun for a stained glass effect.
- •Make seasonal suncatchers: green leaves for summer, fall colors for autumn, evergreen needles for winter.
- •Create 'window scenes' with multiple suncatchers arranged to tell a story.
- •Add tissue paper squares between natural items for pops of translucent color.
Cleanup Tips
- Contact paper backing is recyclable—don't throw away, recycle.
- Pressed flowers that didn't make the cut can go in compost.
- Leftover contact paper stores rolled up in a drawer for future crafts.
- If contact paper sticks to the table, rub with a bit of oil to release.
Real Parent Story
"Sasha and I started making suncatchers as a way to 'save' the beautiful flowers she kept picking from our garden. Instead of watching them wilt in a cup of water, we press them and they last forever. Our kitchen window now has five suncatchers from different seasons—spring cherry blossoms, summer rose petals, fall maple leaves, winter evergreen branches, and one 'abstract' one that's just a mess of whatever she found that day (that one might be my favorite). When family comes to visit, she gives them a tour of each suncatcher and explains where we found everything: 'This leaf is from the big tree at the park. This flower is from Grandma's garden.' She remembers every single collecting trip. Last month, she asked if we could make suncatchers for her preschool friends' birthdays instead of buying gifts. Now we have a little assembly line going: she collects and arranges, I handle the contact paper, and together we make personalized suncatchers for kids who probably don't have handmade art in their windows. It's become more than a craft—it's how we connect with nature and with people we love."
— Mira, mom of 4-year-old Sasha
Bonus Tips From Parents
- Thinner items press and display better than thick ones. Remove stems when possible.
- Suncatchers fade over time—take photos when they're fresh to remember the original colors.
- Make matching suncatchers to send to far-away family members.
- Rotate suncatchers seasonally rather than keeping them up year-round—it keeps the display fresh.
References & Further Reading
General guidance we rely on when writing activities. These are broad resources rather than sources for this specific craft.
Toddler Ages & Stages
American Academy of Pediatrics
What to expect physically, socially and cognitively from 1 to 3 years.
The Power of Play
American Academy of Pediatrics
Why unstructured, hands-on play matters more than structured lessons at this age.
Choking Prevention
American Academy of Pediatrics
How to judge whether an object is a choking risk, and what to do if it happens.
Art Material Safety & the AP Seal
Art & Creative Materials Institute
Look up which craft supplies are certified non-toxic for children.
Toddler Play & Learning
Raising Children Network
Evidence-based play ideas grouped by developmental skill.
Poison Control
America's Poison Centers
Free 24/7 guidance if your child swallows something they shouldn't.
Ready for more fun?