Nature Texture Board
My daughter's texture board started as a rainy-day project and became a permanent fixture in her playroom. I glued different materials to a piece of cardboard: sandpaper for rough, fleece for soft, bubble wrap for bumpy, foil for smooth and cool. She returns to it constantly, running her hands across the surfaces, sometimes closing her eyes to focus on the feeling. When she learned to talk, texture words were among her first: 'soft,' 'scratchy,' 'bumpy.' That board taught her vocabulary I didn't even know I was teaching.
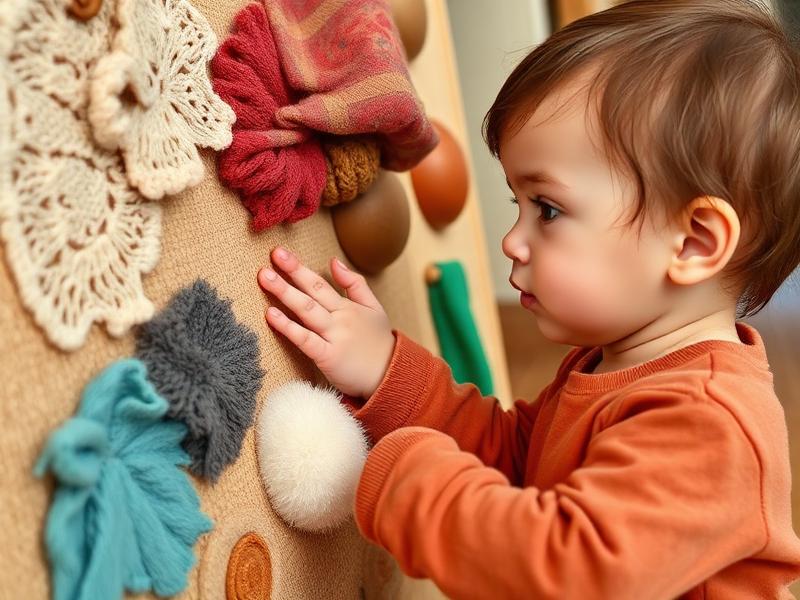
Age Safety Note
Safety depends entirely on construction. Every item on the board must be securely glued with no loose edges, corners, or pieces that could detach and become choking hazards. Check the board before every use by tugging on each item. Avoid small objects (buttons, beads) even if glued—babies can be surprisingly strong. Skip sharp materials (actual sandpaper corners, rough tree bark). When in doubt, leave it out. Replace the board periodically as wear creates potential hazards.
Why This Activity Works
Texture exploration is sensory development in action. When babies touch different surfaces, they're building neural pathways that help them understand the physical world. Naming textures as they're touched builds vocabulary naturally. The variety of sensations keeps babies engaged longer than any single-texture toy. And because the board is always available, babies can return to it again and again, reinforcing learning through repetition.
Materials Needed
- Sturdy cardboard
A large piece of corrugated cardboard from a shipping box works perfectly.
- Fabric scraps
Fleece, velvet, corduroy, burlap—different textures are the whole point.
- Sandpaper
Fine grit only, and cover the edges so they can't scratch skin.
- Cotton balls
Glue in clumps for fluffy texture exploration.
- Bubble wrap
Small bubbles, firmly glued, provide bumpy texture and occasional pops.
- Aluminum foil
Smooth, cool, and crinkly—glue flat and tape edges for safety.
- Strong craft glue
Everything must be FIRMLY attached. Hot glue works best for a strong bond.
Prep Tips (Before You Start)
- 1Plan your layout before gluing—variety of textures in random placement encourages full exploration.
- 2Use hot glue or very strong craft glue. Regular white glue isn't strong enough.
- 3Let glue dry completely (several hours minimum) before presenting to baby.
- 4Check every item by pulling firmly—if it moves at all, add more glue.
- 5Cover any sharp edges with additional fabric or tape.
Step-by-Step Guide
- 1Cut cardboard to your desired size (12x12 inches is a good start).
- 2Arrange materials on the board before gluing to plan the layout.
- 3Glue each item firmly, pressing until adhesive sets. Let dry completely.
- 4Check every piece for security—tug test each one.
- 5Present the board to your baby. Guide their hand across different textures.
- 6Name each texture as they touch: 'This is SOFT. This is BUMPY. This is SCRATCHY.'
- 7Let baby explore independently while you supervise and narrate.
- 8Store the board where baby can access it for spontaneous texture exploration.
Fun Variations to Try
- •Make themed boards: all natural materials, all fabrics, all kitchen textures.
- •Create a 'seeking board' with textures hidden under fabric flaps.
- •Make a floor-size texture path for walking across different sensations.
- •Add items from nature: smooth stones, pinecones, large shells (check for sharp edges).
Cleanup Tips
- Wipe the board with a damp cloth periodically—baby hands are often sticky!
- Inspect regularly for loose pieces and re-glue as needed.
- Replace the entire board when materials start to wear or lift.
- Store flat to prevent warping.
Real Parent Story
"Leo was born premature and spent his first weeks in the NICU. His occupational therapist talked about sensory development and how preemies often need extra sensory input to catch up. She suggested a texture board. I made one that weekend—a mishmash of fabrics and materials from around the house. Leo took to it immediately. He'd crawl over to it, sit himself down, and systematically touch every section. Eyes closed, total focus. It became part of his daily routine. His therapist was thrilled with his progress. By 12 months, he was testing and exceeding every sensory milestone. I don't know how much credit the texture board deserves, but it's still hanging on his wall. He's 18 months now, and sometimes I still find him there, running his hands across the squares, whispering the words: 'soft... bumpy... scratchy...' It's his meditation. It's mine too, watching him."
— Rosa, mom of 18-month-old Leo
Bonus Tips From Parents
- Start simple—5-6 textures is plenty. You can always add more later.
- Natural textures from outside (bark, leaves, stones) connect babies to the natural world.
- Hang the board at baby's height so they can explore independently.
- Model texture exploration yourself: close your eyes, touch, and describe what you feel.
References & Further Reading
General guidance we rely on when writing activities. These are broad resources rather than sources for this specific craft.
Toddler Ages & Stages
American Academy of Pediatrics
What to expect physically, socially and cognitively from 1 to 3 years.
The Power of Play
American Academy of Pediatrics
Why unstructured, hands-on play matters more than structured lessons at this age.
Choking Prevention
American Academy of Pediatrics
How to judge whether an object is a choking risk, and what to do if it happens.
Art Material Safety & the AP Seal
Art & Creative Materials Institute
Look up which craft supplies are certified non-toxic for children.
Toddler Play & Learning
Raising Children Network
Evidence-based play ideas grouped by developmental skill.
Poison Control
America's Poison Centers
Free 24/7 guidance if your child swallows something they shouldn't.
Ready for more fun?