
Tape Resist Painting
Tape-resist painting uses removable tape to leave lines and shapes visible beneath washable paint. This guide covers simple patterns, setup, and cleanup.
Age Safety Note
Follow the tape and paint product directions and choose materials labeled for the child's age. An adult should prepare and remove tape for younger children. Keep tape and paint away from mouths and supervise closely; washable or non-toxic labels do not make materials food.
What This Activity Offers
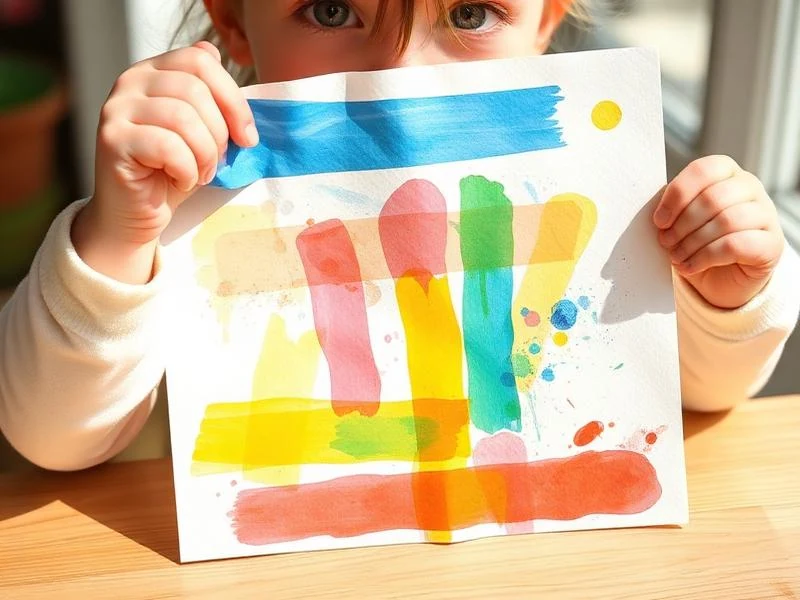
Tape masks parts of a page while paint is added; removing the tape reveals lines or shapes. Children can choose a pattern or color without needing to follow a fixed design.
Materials Needed
- Painter's tape
Blue or green low-tack tape. Width doesn't matter—thinner makes more detailed patterns.
- Cardstock or thick paper
Regular paper can tear when tape is removed. Heavier paper is essential.
- Washable paints
Any colors your child loves. Darker colors show the white contrast best.
- Paint brushes
Chunky handles for easier gripping. Multiple brushes mean less color mixing if that matters to you.
- Paper plate palette
Pour small amounts of paint onto a paper plate for easy dipping.
Prep Tips (Before You Start)
- 1Tape the paper before presenting the activity—watching tape application isn't as fun as painting.
- 2Start with simple shapes: diagonal lines, a big X, a heart, or your child's initial.
- 3Press tape edges firmly so paint doesn't seep underneath (though some seepage adds charm!).
- 4Cover your work surface. Tape protect, not tables.
- 5Dress for mess—smock, old clothes, or just diaper if it's warm.
Step-by-Step Guide
- 1Show your child the taped paper. 'Look, there's tape making shapes! Let's paint ALL over it!'
- 2Offer 2-3 paint colors and brushes. Let your child paint freely—covering tape, filling spaces, going wild.
- 3Encourage painting over the tape: 'Paint right on top of the tape! It's okay!'
- 4When the whole paper is covered (or your child is done), set it aside to dry completely. This is important!
- 5Once fully dry (at least 30 minutes), bring back the painting. 'Ready for the magic?'
- 6Adult carefully peels off the tape while your child watches. Go slowly for maximum drama!
- 7Celebrate the revealed pattern: 'Look what was hiding under the tape! The white lines were there the whole time!'
- 8Display the finished artwork prominently—this is frameable quality!
Fun Variations to Try
- •Let your child apply their own tape for 'abstract' patterns. Chaos is fine!
- •Use tape to make letters—reveal your child's name hidden in the paint.
- •Layer the reveal: tape, paint, dry, tape more, paint again for multi-colored patterns.
- •Try on canvas boards instead of paper for gallery-quality keepsakes.
Cleanup Tips
- Peel tape over a trash can—small bits can stick to floors.
- Wash brushes immediately; dried washable paint is harder to remove.
- Soak painted hands in warm soapy water for easy cleanup.
- Display or photograph artwork before washing the paint-covered smock!
Additional Tips
- Follow the paint label and wait until the surface is fully dry before peeling the tape.
- For more defined lines, press tape edges with a credit card or ruler.
- Make it seasonal: pumpkin shapes for fall, tree shapes for winter, flowers for spring.
- Create cards for family—tape a simple design, paint, reveal, and mail the love!
References & Further Reading
General background resources for readers. They do not verify or test any specific activity, material, or setup described on this site.
Toddler Ages & Stages
American Academy of Pediatrics
What to expect physically, socially and cognitively from 1 to 3 years.
The Power of Play
American Academy of Pediatrics
An overview of play and its place in early childhood.
Choking Prevention
American Academy of Pediatrics
General guidance on choking risks and prevention for children.
Small Parts and Choking Hazard Labeling FAQs
U.S. Consumer Product Safety Commission
Explains U.S. small-parts rules and choking-hazard labels for children's products; household materials still need separate adult judgment.
Water Safety and Young Children
American Academy of Pediatrics
Guidance on close supervision around water and emptying open containers after use.
Lead in Soil
U.S. Environmental Protection Agency
Explains soil exposure during play and recommends preventing soil eating and washing exposed skin after contact.
Preventing Window Falls
U.S. Consumer Product Safety Commission
Window guards, stops, and keeping furniture away from windows can help reduce fall risks.
Art Material Safety & the AP Seal
Art & Creative Materials Institute
Explains the ACMI certification seals used on some art and creative materials.
Toddler Play & Learning
Raising Children Network
Play ideas and age-based information for caregivers.
Poison Control
America's Poison Centers
Free 24/7 guidance if your child swallows something they shouldn't.
Ready for more fun?