Tissue Paper Suncatcher
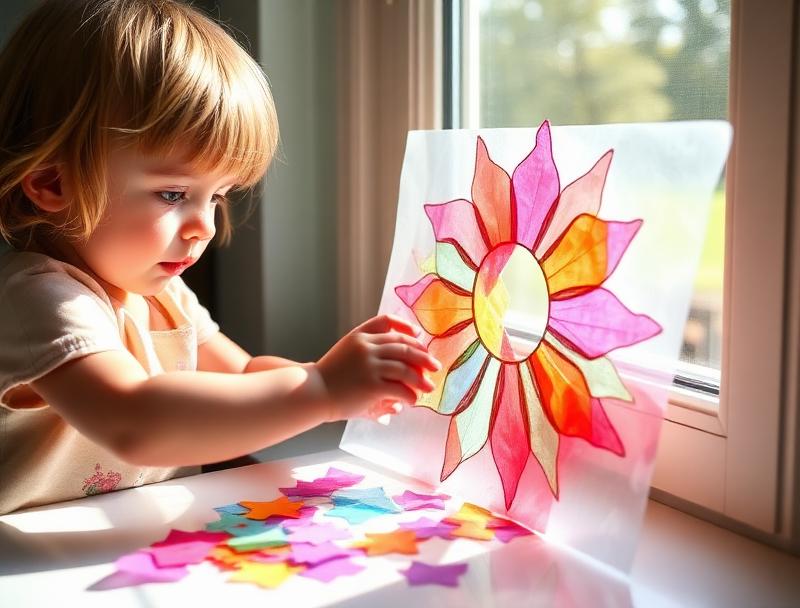
When the afternoon sun hits our front window, it streams through the tissue paper suncatchers my daughter made and casts colored light all over the living room. She calls it 'rainbow time' and stops whatever she's doing to stand in the colored light. Tissue paper suncatchers are one of those crafts that look impressive but are actually quite simple. Colored tissue paper pressed between sheets of contact paper catches and filters light beautifully. The resulting art is translucent, glowing, and utterly magical when displayed in a sunny window.
Age Safety Note
This craft is safe for 3-4 year olds with adult handling of contact paper and scissors. Contact paper edges can be sharp after cutting, so adults should do all cutting and help with the pressing. Tissue paper is non-toxic if accidentally tasted, but supervise to prevent eating. The sticky side of contact paper is very sticky—prepare your child for the sensation before they touch it, and consider taping the edges down to the table to prevent it from sticking to everything.
Why This Activity Works
Suncatcher crafts develop fine motor skills through the small, precise movements required to place tissue paper pieces. The layering decisions—which colors go where—build spatial reasoning and color theory understanding. And the final product provides daily joy when sunlight activates it. For children, creating something that changes the light in their home feels powerful and important. 'I made that' is a powerful sentence, especially when 'that' is casting rainbows across the floor.
Materials Needed
- Clear contact paper
Two pieces per suncatcher—one for the base, one to seal on top.
- Tissue paper
Multiple colors. Pre-tear or cut into small squares for easier handling.
- Paper plate (optional)
Cut out the center to create a frame that holds the contact paper.
- Scissors
Adult use only for cutting contact paper and paper plate.
- Yarn or ribbon
For hanging. About 12 inches per suncatcher.
- Tape
For securing contact paper edges to the table during creation.
Prep Tips (Before You Start)
- 1Pre-tear tissue paper into small pieces (about 1-2 inch squares). This is the time-consuming step—do it ahead.
- 2Cut contact paper to your desired size. A standard piece is about 8x8 inches.
- 3Tape the contact paper sticky-side-up to the table so it doesn't curl or slide.
- 4If using a paper plate frame, cut out the center first, leaving a 1-2 inch frame around the edge.
- 5Sort tissue paper by color into small cups or piles for easy access.
Step-by-Step Guide
- 1Introduce the activity: 'We're making something that will catch the sun! It's going to glow in the window!'
- 2Show the contact paper with its sticky side up. Let your child touch it. 'It's sticky! Things will stick to it!'
- 3Demonstrate placing a piece of tissue paper on the contact paper. 'Press it down. Now it's stuck!'
- 4Invite your child to add tissue paper pieces. 'Fill up the whole square! Overlap colors to make new colors!'
- 5Point out color mixing as it happens: 'Look—blue and yellow overlapping makes green!'
- 6When the contact paper is covered, carefully place another sheet on top, sticky side down, to seal.
- 7Smooth out air bubbles by pressing from the center outward.
- 8If using a paper plate frame, tape the contact paper 'window' to the back. Punch a hole and add yarn for hanging.
- 9Hang in a sunny window and wait for the magic—afternoon sun is usually best.
Fun Variations to Try
- •Add other flat items between the contact paper: pressed flowers, flat leaves, small feathers.
- •Make holiday suncatchers using themed colors: red/green for Christmas, pastels for Easter, orange/black for Halloween.
- •Create shapes by cutting the sealed contact paper: circles, hearts, stars, butterflies.
- •Make a mobile with multiple small suncatchers hanging at different lengths.
Cleanup Tips
- Contact paper backing can go in the recycling.
- Tissue paper scraps can be saved for future crafts or composted.
- If contact paper sticks to the table, rub with a bit of cooking oil to release.
- Store leftover contact paper rolled up in a drawer; it keeps well for months.
Real Parent Story
"We made suncatchers on a gray November day when everyone was cranky and stir-crazy. I desperately needed an activity that would occupy both twins simultaneously without requiring me to referee. Tissue paper suncatchers were perfect—each kid had their own contact paper square and their own pile of tissue paper. They worked in focused silence for a solid twenty minutes (miraculous for my two). Nora created a careful rainbow pattern, progressing through colors in order. Eli made what he called 'a explosion' with random colors overlapping everywhere. Both were beautiful in completely different ways. We hung them side by side in the playroom window, and when the sun hit them the next morning, both kids ran to look. 'MY rainbow!' 'MY explosion!' They were so proud. Months later, those suncatchers are still hanging. They're faded now, and a few tissue paper edges have lifted, but the twins won't let me take them down. Every time the sun comes through, Eli still says, 'That's my explosion.' I'll leave them up forever if that's what they want."
— Ellen, mom of 4-year-old twins Nora and Eli
Bonus Tips From Parents
- Layering colors creates new colors—this is a great chance to teach color mixing.
- For younger children, use larger tissue paper pieces for easier handling.
- Very thin tissue paper is more translucent but tears more easily. Medium-weight is ideal.
- Suncatchers make great gifts for grandparents—mail them flat between cardboard.
References & Further Reading
General guidance we rely on when writing activities. These are broad resources rather than sources for this specific craft.
Toddler Ages & Stages
American Academy of Pediatrics
What to expect physically, socially and cognitively from 1 to 3 years.
The Power of Play
American Academy of Pediatrics
Why unstructured, hands-on play matters more than structured lessons at this age.
Choking Prevention
American Academy of Pediatrics
How to judge whether an object is a choking risk, and what to do if it happens.
Art Material Safety & the AP Seal
Art & Creative Materials Institute
Look up which craft supplies are certified non-toxic for children.
Toddler Play & Learning
Raising Children Network
Evidence-based play ideas grouped by developmental skill.
Poison Control
America's Poison Centers
Free 24/7 guidance if your child swallows something they shouldn't.
Ready for more fun?